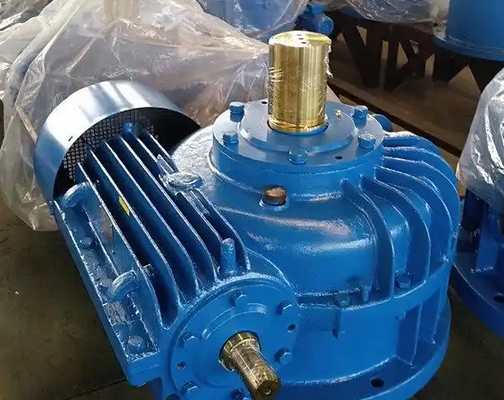
How to replace the gears of the CWS280-63-IVF worm gear reducer.
To replace the gears of the CWS280-63-IVF worm gear reducer, please refer to the following steps:
1. Preparation work: Ensure that the equipment completely stops running, cut off the power, and hang a "Do Not Close" warning sign. After the oil temperature cools down, unscrew the oil drain plug at the bottom of the reducer and collect the old gear oil. Wipe the surface of the shell with cleaning agent to remove oil stains and debris. Prepare new gear, sealant, gasket and other consumables, as well as tools such as puller, top screw, wrench, copper rod, kerosene or special cleaning agent.
2. Disassemble external accessories: Loosen the elastic pin or pulley fastening bolt of the coupling, and slowly pull it out with a puller. Remove accessories such as oil temperature sensors, oil level gauges, and cooling water pipes, and seal the pipe openings to prevent foreign objects from entering.

3. Disassemble the end cover and bearing cover: Loosen the connecting bolts between the gearbox cover and the base in diagonal order. For structures with locating pins, first remove the locating pins and then remove the upper cover. Gently tap the edge of the upper cover with a copper rod, and use a top wire to separate the upper cover from the base, taking care to avoid colliding with the gears. Observe the condition of the sealant or gasket, and if replacement is necessary, clean any remaining adhesive stains.
4. Remove gear components: First remove the bearing end cap bolts, then remove the shaft system components as a whole. For multi-stage gear transmission, disassemble in the order of "high-speed stage → low-speed stage", and record the gear meshing position. If the bearing needs to be replaced, use a puller or press to remove the bearing from the shaft. For interference fit bearings, the shaft can be heated or the bearing can be cooled before disassembly.
5. Dismantling the worm gear (if applicable): First, remove the end cover of the worm shaft, then take out the worm component, and pay attention to recording the meshing clearance between the worm gear and the worm wheel. Worm gears usually have an interference fit with the shaft and need to be disassembled with a puller or hydraulic tool to avoid damaging the worm gear tooth surface.
6. Cleaning and Inspection: Use gasoline or specialized cleaning agents to clean gears, bearings, housings, and other parts, removing oil sludge and metal debris. Check whether there is wear, pitting, or cracking on the gear tooth surface, whether there are scratches or rust on the bearing rolling elements/raceways, whether the housing joint surface is flat, whether there are cracks or deformations, and whether the threaded holes have slipped teeth.
7. Install new gear: deburr the new gear and apply molybdenum disulfide grease to the mating surface. Restore the gear meshing position according to the markings during disassembly, and pre tighten the bolts in stages to the standard torque. The bearing is heated to 80-100 ℃ using the oil bath heating method, and then installed after insulation. A centering guide sleeve is used to ensure that the bearing maintains a suitable interference fit with the seat hole.
8. Assembly of gearbox: Install the gear shaft assembly back into the box and tighten the bearing end cap bolts. Close the upper cover and base together, tighten the connecting bolts in diagonal order, and pay attention to installing the positioning pin. Install external accessories such as couplings, pulleys, oil temperature sensors, oil level gauges, cooling water pipes, etc.
9. Add lubricating oil: According to the requirements of the reducer, add an appropriate amount of new gear oil.
10. Trial operation: After completing the replacement and assembly, conduct a trial operation to check the operating condition of the gearbox, including noise, vibration, temperature, etc., to ensure its normal operation.

